Sunday, 17 August 2014

Eclipse

Eclipse - Create Java Class

Opening the New Java Class wizard

You can use the New Java Class wizard to create a Java class. The Java Class wizard can be invoked in different ways:
  • By clicking on the File menu and selecting New > Class
  • By right clicking in the package explorer and selecting New > Class
  • By clicking on the class drop down button () and selecting class ( )
Before bringing up the New Java Class wizard, if possible, select the package in which the class is to be created so that the wizard can automatically fill in the package name for you.

Using the New Java Class wizard

Once the java class wizard comes up:
  • Ensure the source folder and package are correct
  • Enter the class name
  • Select the appropriate class modifier
  • Enter the super class name or click on the Browse button to search for an existing class
  • Click on the Add button to select the interfaces implemented by this class
  • Examine and modify the check boxes related to method stubs and comments
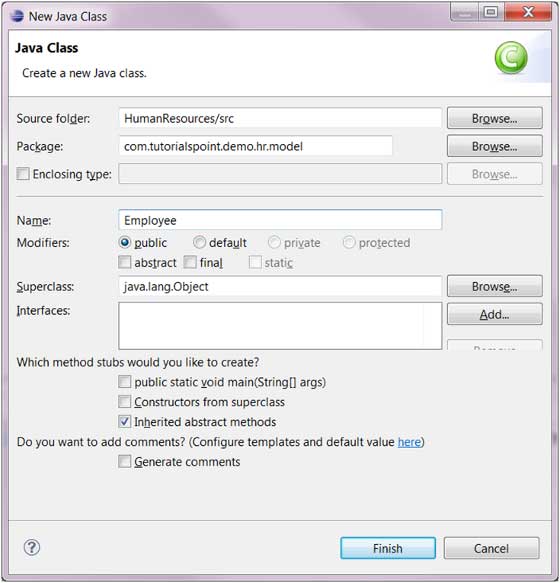
  • Click on the Finish button

Viewing the newly created java class

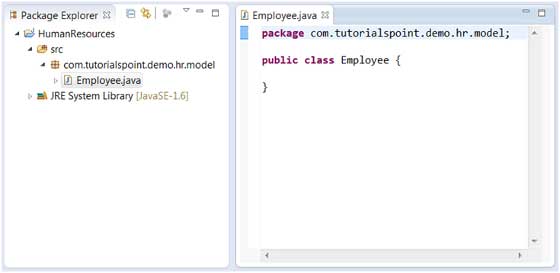
The newly created class should appear in the Package Explorer view and a java editor instance that allows you to modify the new class should appear in the editor area.
Eclipse - Create Java Interface


Opening the New Java Interface wizard

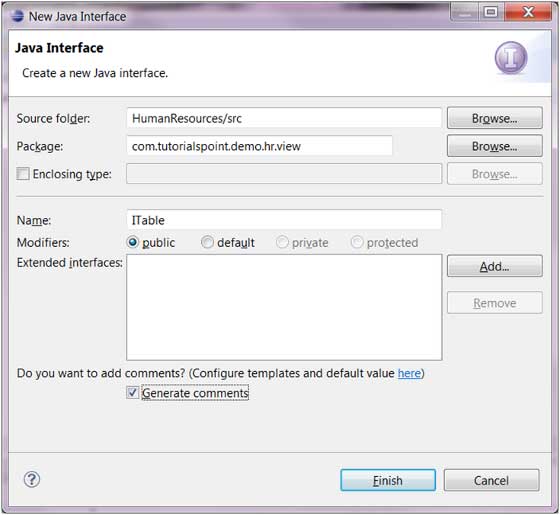
The New Java Interface wizard can be used to create a new java interface. There are many ways of opening this wizard:
  • Clicking on the File menu and selecting New > Interface
  • Right clicking in the package explorer and selecting New > Interface
  • Clicking on the class drop down button () in the tool bar and selecting Interface ()
Before bringing up the New Java Interface wizard, if possible, select the package in which the interface is to be created so that the wizard can automatically fill in the package name for you.

Using the New Java Interface wizard

Once the java interface wizard comes up:
  • Ensure the source folder and package are correct
  • Enter the interface name
  • Click on the Add button to select the interfaces this interface should extend
  • Select the Generate comments check box if you like comments to be generated
  • Click on the Finish button

Viewing the newly created java interface

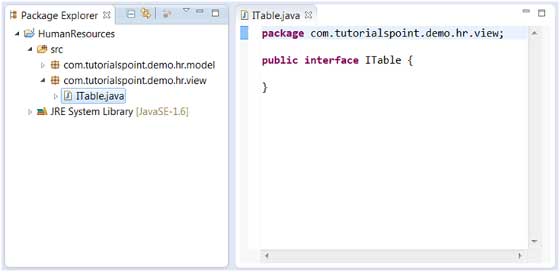
The newly created interface should appear in the Package Explorer view and a java editor instance that allows you to modify the new interface should appear in the editor area.
Eclipse - Create XML File


Opening the New XML File wizard

You can use the New XML file wizard to create an XML file. To invoke this wizard:
  • Click on the File menu and select New > Other or
  • Click on the new drop down box () select other or
  • Press ctrl + N
Once the Select a wizard dialog box comes up:
  • In the filter text box enter xml, this should show only the wizards related to xml
  • Expand XML category and select XML File
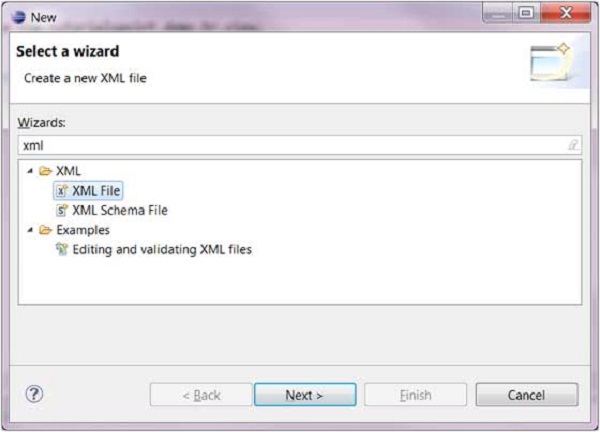
  • Click on Next to bring up the New XML File wizard


NOTE:

If the XML perspective is open the New XML wizard can be invoked by:
  • Clicking on the File menu and selecting New > XML File or
  • Clicking on the XML File button ( ) on the tool bar

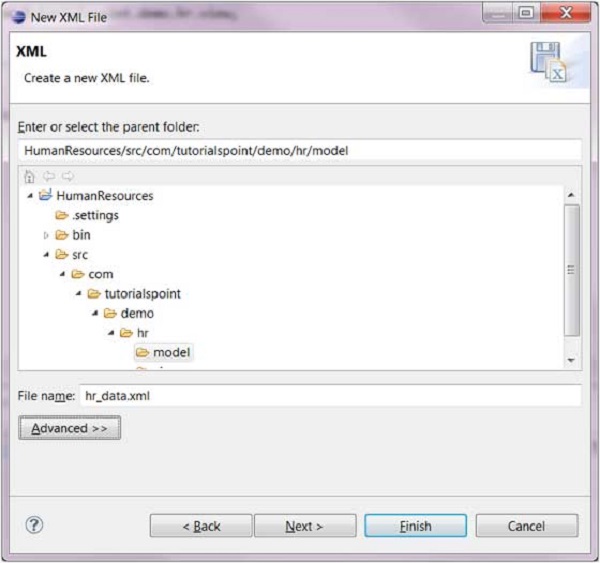
Using the New XML File wizard

Once the New XML File wizard comes up:
  • Enter or select the parent folder
  • Enter the name of the xml file

  • Click on the Next button to base the xml file on DTD, XML Schema or XML template else click on Finish

Viewing the newly created XML File

The newly created XML file should appear in the Package Explorer view and an XML editor instance that allows you to modify the newly created XML file should appear in the editor area.
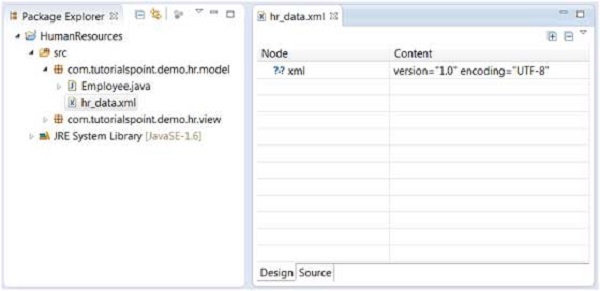
The XML editor allows you to edit an XML file using either the Design view or Source view.

Eclipse - Java Build Path


Setting the Java Build Path

The Java build path is used while compiling a Java project to discover dependent classes . It is made up of the following items:
  • Code in the source folders
  • Jars and classes folder associated with the project
  • Classes and libraries exported by projects referenced by this project
The java build path can be seen and modified by using the Java Build Path page of the Java Project properties dialog.
To bring up the Java Project properties dialog box, right click on a Java Project in the Package Explorer view and select the Properties menu item. On the left hand side tree select Java Build Path.
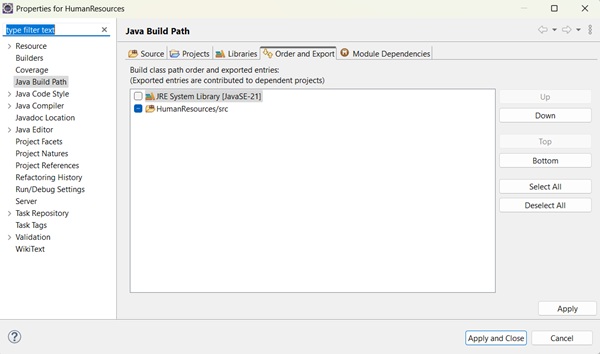
A common requirement seen while developing java applications is to add existing jars to the java build path. This can be accomplished using the Libraries tab. In the Libraries tab, just click on Add JARs if the jar is already in the Eclipse workspace or click on Add External JARs if the jar is elsewhere in the file system.

Eclipse - Run Configuration


Creating and Using a Run Configuration

The Run Configurations dialog allows you create multiple run configurations. Each run configuration can start an application.
The Run Configuration dialog can be invoked by selecting the Run Configurations menu item from the Run menu.
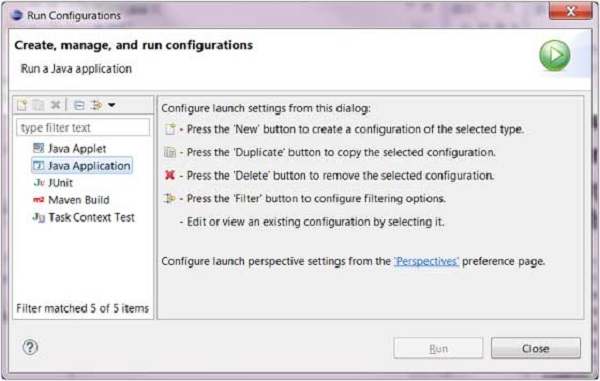
To create a run configuration for a Java application select "Java Application" from the list on the left hand side and click on the New button.
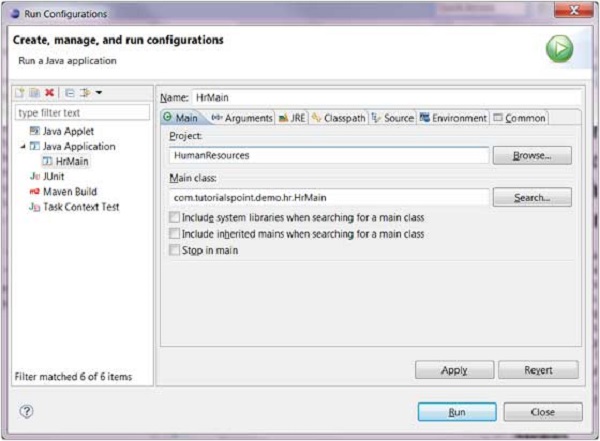
In the dialog box that comes up in the main tab specify:
  • A name for the run configuration
  • The name of a Project
  • The name of the main class
In the arguments tab specify:
  • Zero or more program arguments
  • Zero or more Virtual Machine arguments
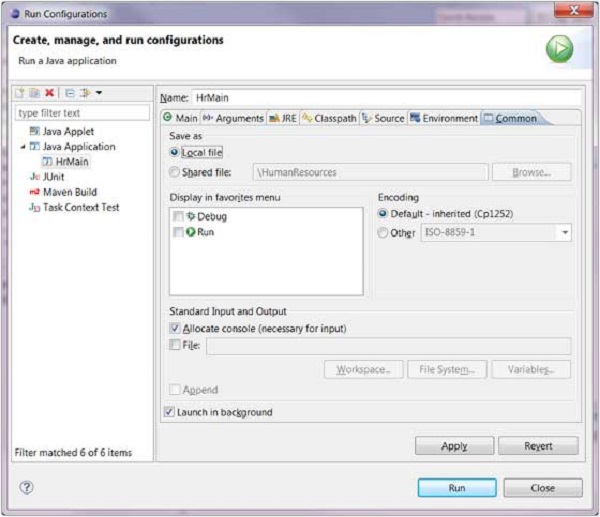
The Commons tab provides common options such as the ability to allocate a console for standard input and output.
To save the run configuration click on the Apply button and to launch the application click on the Run button.

Eclipse - Running Program


Running a Java Program

The quickest way to run a Java program is to using the Package Explorer view.
In the Package Explorer view:
  • Right click on the java class that contains the main method
  • Select Run As > Java Application
The same action can be performed using the Package Explorer view by selecting the class that contains the main method and pressing Alt + Shift + X, J
Either actions mentioned above create a new Run Configuration and use it to start the Java application.
If a Run configuration has already been created you can use it to start the Java application by selecting Run Configurations from the Run menu, clicking on the name of the run configuration and then clicking on the Run button.
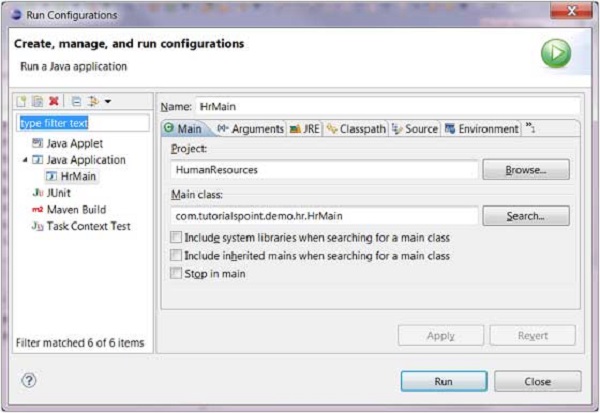
The Run menu item on the Run menu can be used to restart the java application that was previously started.
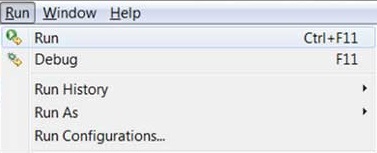
The shortcut key to launch the previously launched Java application is Ctrl + F11.

Saturday, 16 August 2014

Eclipse - Create Java Package

Eclipse - Create Java Package


Opening the New Java Package wizard

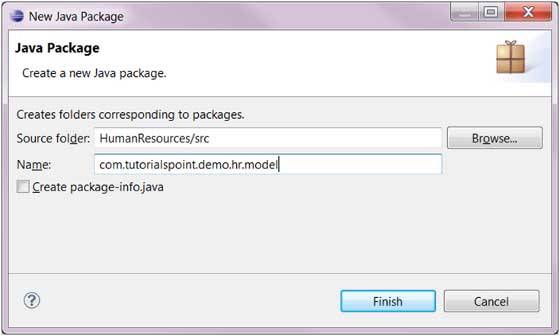
You can use the New Java Package wizard to create a Java package. The Java Package wizard can be opened in different ways:
  • By clicking on the File menu and selecting New > Package
  • By right click in the package explorer and selecting New > Package
  • By clicking on the package icon which is in the tool bar( )
If you are creating a sub package, before opening the Java Package wizard select the parent packageso that name field can have a default value in it.

Using the New Java Package wizard

Once the Java Package wizard comes up:
  • Enter/confirm the source folder name
  • Enter the package name
  • Click on the Finish button

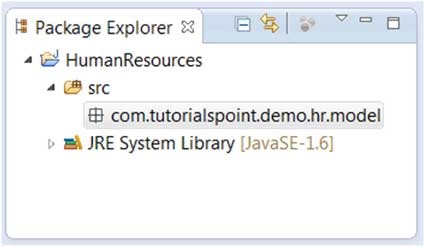
Viewing the newly created package

The package explorer will show the newly created package under the source folder.

Eclipse - Create Java Project

Eclipse - Create Java Project


Opening the New Java Project wizard

The New Java Project wizard can be used to create a new java project. There are many ways to open this wizard:
  • By clicking on the File menu and choosing New > Java Project
  • By right clicking anywhere in the Project Explorer and selecting New > Java Project
  • By clicking on the New button ( ) in the Tool bar and selecting Java Project
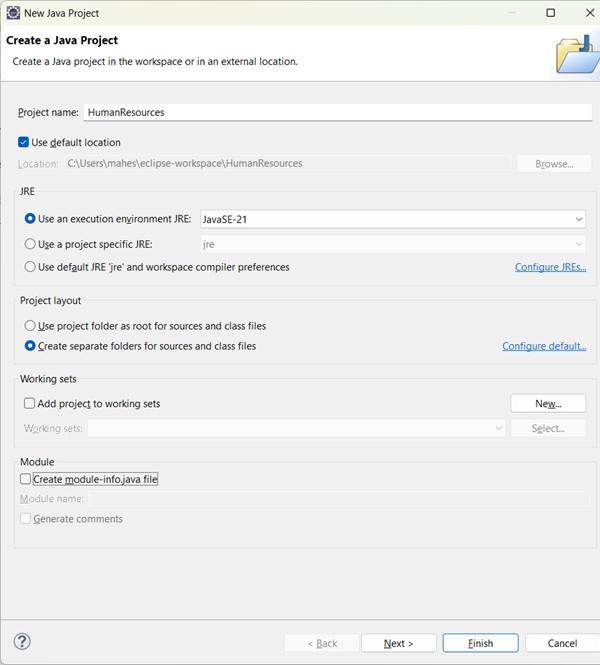
Using the New Java Project wizard

The New Java Project Wizard has two pages.
On the first page:
  • Enter the Project Name
  • Select the Java Runtime Environment (JRE) or leave it at the default
  • Select the Project Layout which determines whether there would be a separate folder for the sources code and class files. The recommended option is to create separate folders for sources and class files.

You can click on the Finish button to create the project or click on the Next button to change the java build settings.
On the second page you can change the Java Build Settings like setting the Project dependency (if there are multiple projects) and adding additional jar files to the build path.

Viewing the newly created project

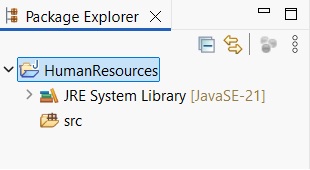
The package explorer shows the newly created Java project. The icon that represents a Project is decorated with a "J" to show that it is a Java Project. The folder icon is decorated to show that it is a java source folder.


Eclipse - Workspaces

Eclipse - Workspaces


About Eclipse Workspace

The eclipse workspace contains resources such as:
  • Projects
  • Files
  • Folders
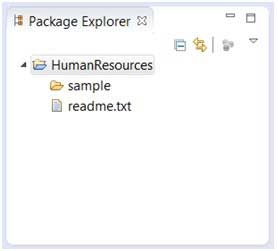
The workspace has a hierarchical structure. Projects are at the top level of the hierarchy and inside them you can have files and folders. Plug-ins use an API provided by the resources plug-in to manage the resources in the workspace.

UI Elements for Managing the Workspace

Users use the functionality provided by views, editors and wizard to create and manage resources in the workspace. One among the many views that show the content of the workspace is the Project Explorer view.

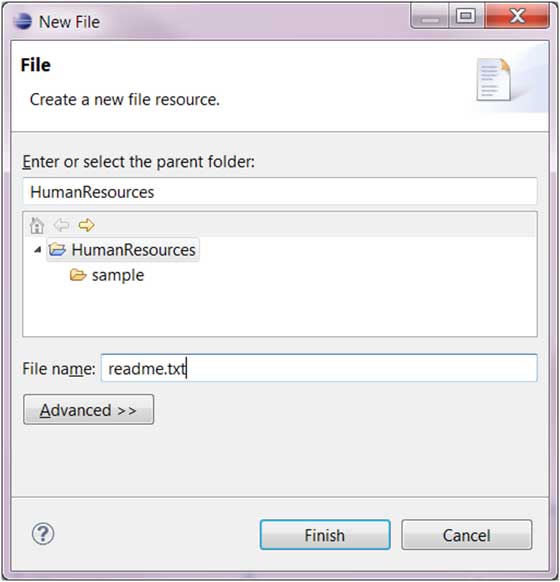
The File Wizard (File > New > File) can be used to create a new file.

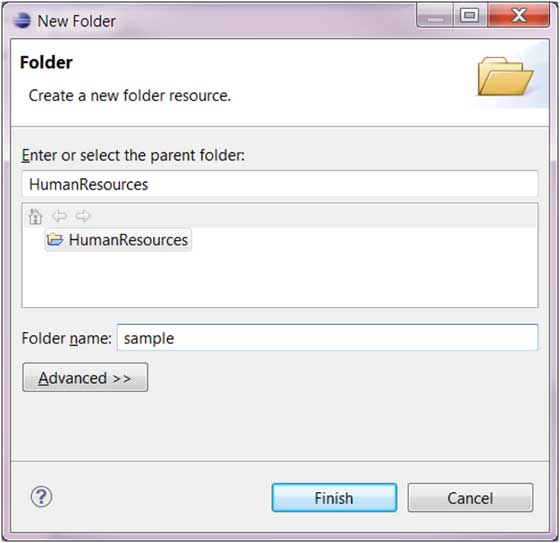
The Folder Wizard (File > New > Folder) can be used to create a new folder.


Eclipse - Perspectives

Eclipse - Perspectives


What is a Perspective?

An eclipse perspective is the name given to an initial collection and arrangement of views and an editor area. The default perspective is called java. An eclipse window can have multiple perspectives open in it but only one perspective is active at any point of time. A user can switch between open perspectives or open a new perspective. The active perspective controls what appears in some menus and tool bars.

Opening a Perspective

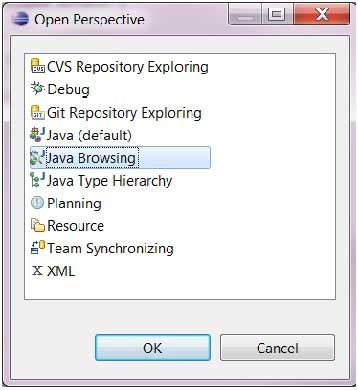
To open a new perspective, click on the Windows menu and select Open Perspective > Other

The Open Perspective dialog box shows all the available perspectives.
The same dialog can be brought up by clicking on the Open Perspective button ( ) on the tool bar.

Switiching Between Perspectives

The most commonly used perspectives for java development are the Java perspective and Debug perspective. Users can switch between open perspectives by clicking on the Perspective name on the toolbar.

Closing a Perspective

To close a perspective, right click on the perspective name in toolbar and select the Close menu item.

Customizing a perspective

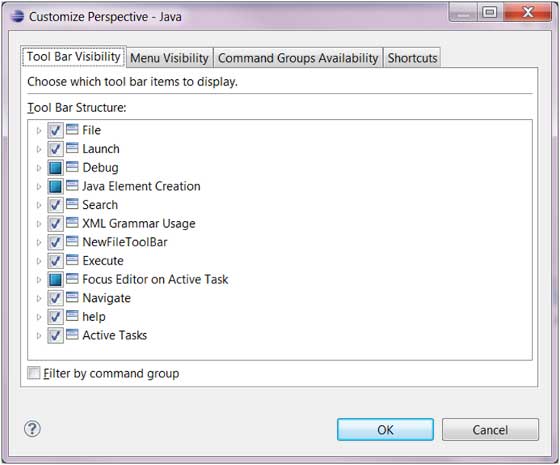
The customize perspective dialog can be used to customize a perspective. Customizing a perspective means:
  • Determining the icons visible on the toolbar when a perspective is active
  • Determining the menu items visible when a perspective is active
  • Determine the menu items in New submenu, Show View submenu and Open Perspective submenu


The Tool Bar Visibility tab can be used to determine which icons are visible on the toolbar when a perspective is open.
The Menu Visibility tab can be used to determine which menu items are visible when a perspective is active.
The Command Groups Availability tab can be used to control the visibility of toolbar icons and menu items.
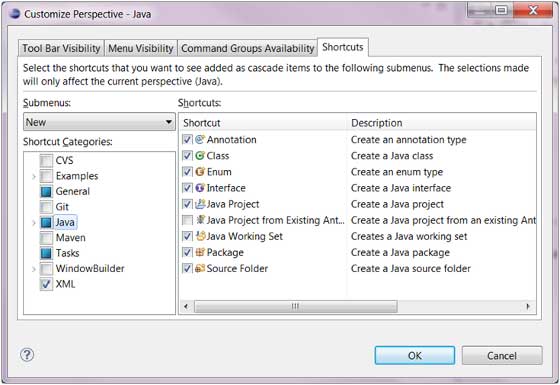
The Shortcuts tab can be used to determine the menu items in New submenu, Show View submenu and Open Perspective submenu.
Based on the Shortcuts selection in the picture given below, to bring up the "New Java Project from Existing Ant Build File" wizard users have to bring up the New submenu (File > New), click on Other, expand the Java category and then select "Java Project from Existing Ant Build File". On the other hand to start the New Class wizard they can bring up the New submenu (File > New) and select the Class menu item becauses its selected in the picture given below. By selecting the "Java Project from Existing Ant Build File" check box this item will also appear under the New menu.


Eclipse - Explore Views

Eclipse - Explore Views


About Views

Eclipse views allow users to see a graphical representation of project metadata. For example the project navigator view presents a graphical representation of the folders and files associated with a project and properties view presents a graphical representation of an element selected in another view or editor.
An eclipse perspective can show any number of views and editors. All editor instances appear in a single editor area whereas views are placed inside view folders. A workbench window can display any number of view folders. Each view folder can display one or more views.

Organizing Views

The following picture shows four views arranged in a view folder.

The picture given below shows the same four views arranged in two view folders.

Moving views

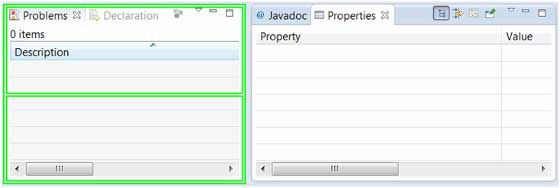
To move a view from one view folder to another just click on the view title and drag to the title bar area of another view folder. The green line shown below is a result of dragging the title bar of the Properties view from one view folder to the title bar area of another view folder. The Properties view can be moved to where the green line is by releasing the mouse button and sending out a drop event.

Creating View Folders

View folders can be dynamically created by dragging the title bar of a view to anywhere outside the editor area and title bar of another view folder. As you drag the title bar around green lines will indicate where exactly the new view folder will be created.

Moving the drag icon to the bottom of a window allows you to create a view folder that spans the entire width of the window. Moving the drag icon to the left or right edge of window allows you to create a view folder that spans the entire height of the window.

Opening a view

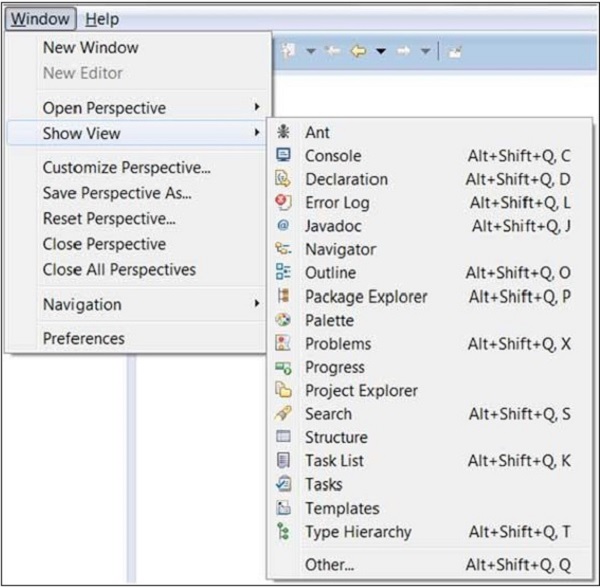
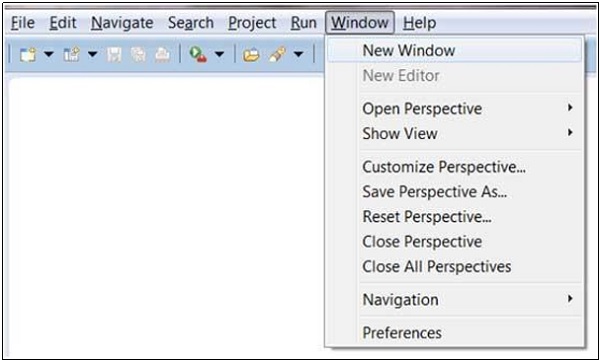
To open a view click on the Window menu and select the Show View menu item and either the menu item that represent a view or the Other menu item.

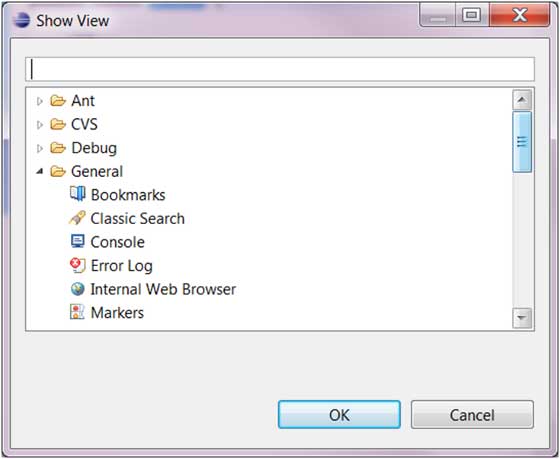
Clicking on the Other menu item brings up the Show View dialog box that allows you to locate and activate a view.

The views are organized by category. To quickly locate a view just type the name of a view into the filter text box. To open a view, select it and click on the OK button.
The subsequent pages of this tutorial introduce you to a number of useful views.

Eclipse - Explore Menus

Eclipse - Explore Menus


Typical Eclipse Menus

The typical menus available on the menu bar of an Eclipse window are:
  • File menu
  • Edit menu
  • Navigate menu
  • Search menu
  • Project menu
  • Run menu
  • Window menu
  • Help menu


Plug-ins can add new menus and menu items. For example when the java editor is open you will see the Source menu and when the XML editor is open you will the Design menu.

Brief Description of Menus

Menu NameDescription
FileThe File menu allows you to open files for editing, close editors, save editor content and rename files. Among the other things, it also allows you to import and export workspace content and shutdown Eclipse.
EditThe Edit menu presents items like copy & paste.
SourceThe Source menu is visible only when a java editor is open. It presents a number of useful menu items related to editing java source code.
NavigateThe Navigate menu allows you to quickly locate resources and navivate to them.
SearchThe Search menu presents items that allow you to search the workspace for files that contain specific data.
ProjectThe menu items related to building a project can be found on the Project menu.
RunThe menu items on the Run menu allow you to start a program in the run mode or debug mode. It also allows presents menu items that allow you to debug the code.
WindowThe Window menu allows you to open and close views and perspectives. It also allows you to bring up the Preferences dialog.
HelpThe Help menu can be used to bring up the Help window, Eclipse Marketplace view or Install new plug-ins. The about Eclipse menu item gives you version information.

Customizing Menus

The visible menu items on a menu depend on the installed plug-ins and customization done using theCustomize Perspective dialog box.

Eclipse - Explore Windows

Eclipse - Explore Windows


Parts of an Eclipse Window

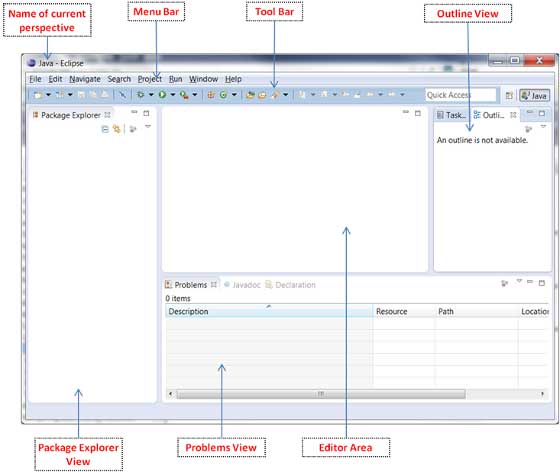
The major visible parts of an eclipse window are:
  • Views
  • Editors (all appear in one editor area)
  • Menu Bar
  • Toolbar
An eclipse perspective is the name given to an initial collection and arrangement of views and an editor area. The default perspective is called java. An eclipse window can have multiple perspectives open in it but only one perspective can be active at any point of time. A user can switch between open perspectives or open a new perspective. A perspective controls what appears in some menus and tool bars.
A perspective has only one editor area in which multiple editors can be open. The editor area is usually surrounded by multiple views. In general, editors are used to edit the project data and views are used to view the project metadata. For example the package explorer shows the java files in the project and the java editor is used to edit a java file.
The eclipse window can contain multiple editors and views but only one of them is active any given point of time. The title bar of the active editor or view looks different from all the others.
The UI elements on the menu bar and tool bar represent commands that can be triggered by an end user.

Using Multiple Windows

Multiple Eclipse Windows can be open at the same time. To open a new window, click on the Windows menu and select the New Window menu item.
Each window can have a different perspective open in them. For example you could open two Eclipse windows one in the Java perspective and the other in the Debug perspective. The window showing the Java perspective can be used for editing the java code and the window showing the debug perspective can be used for debugging the application being developed.

Eclipse - Installation

Eclipse - Installation


Downloading Eclipse

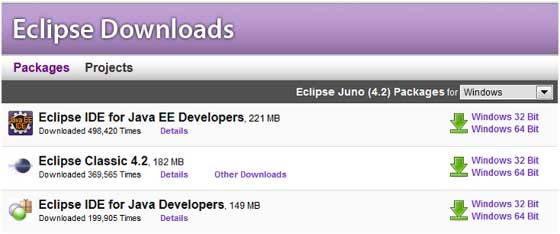
You can download eclipse from http://www.eclipse.org/downloads/. The download page lists a number of flavors of eclipse.
The capabilities of each packaging of eclipse are different. Java developers typically use Eclipse Classic or Eclipse IDE for developing Java applications.
The drop down box in the right corner of the download page allows you to set the operating system on which eclipse is to be installed. You can choose between Windows, Linux and Mac. Eclipse is packaged as a zip file.

Installing Eclipse

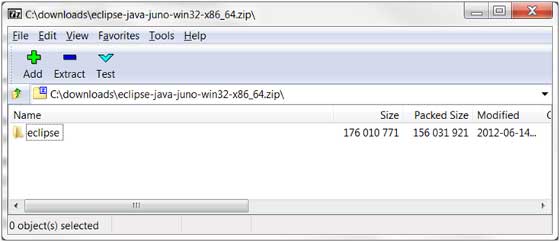
To install windows you need a tool that can extract the contents of a zip file. For example you can use:
Using any one of these tools, extract the contents of the eclipse zip file to any folder of your choice.

Launching Eclipse

On the windows platform, if you extracted the contents of the zip file to c:\, then you can start eclipse by using c:\eclipse\eclipse.exe
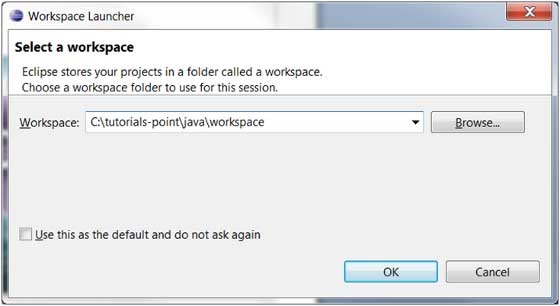
When eclipse starts up for the first time it prompts you for the location of the workspace folder. All your data will be stored in the workspace folder. You can accept the default or choose a new location.