Eclipse - Create Java Class
Opening the New Java Class wizard
You can use the New Java Class wizard to create a Java class. The Java Class wizard can be invoked in different ways:
-
By clicking on the File menu and selecting New > Class
-
By right clicking in the package explorer and selecting New > Class
-
By clicking on the class drop down button (
 ) and selecting class (
  )
)
Before bringing up the New Java Class wizard, if possible, select the package in which the class is to be created so that the wizard can automatically fill in the package name for you.
By clicking on the File menu and selecting New > Class
By right clicking in the package explorer and selecting New > Class
By clicking on the class drop down button ( ) and selecting class (
  )
)
 ) and selecting class (
  )
)Using the New Java Class wizard
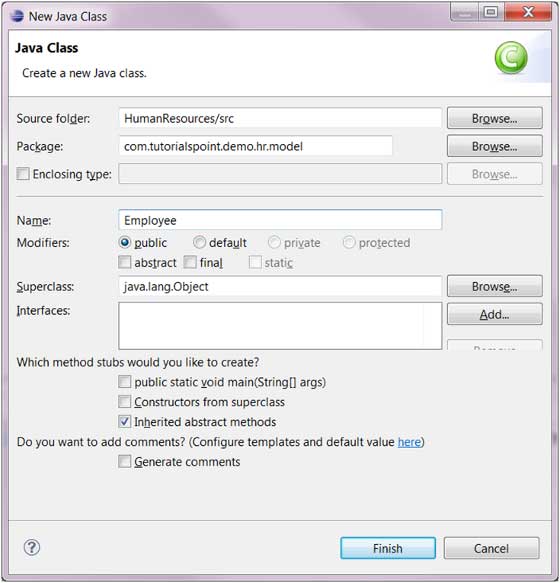
Once the java class wizard comes up:
-
Ensure the source folder and package are correct
-
Enter the class name
-
Select the appropriate class modifier
-
Enter the super class name or click on the Browse button to search for an existing class
-
Click on the Add button to select the interfaces implemented by this class
-
Examine and modify the check boxes related to method stubs and comments
-
Click on the Finish button
Ensure the source folder and package are correct
Enter the class name
Select the appropriate class modifier
Enter the super class name or click on the Browse button to search for an existing class
Click on the Add button to select the interfaces implemented by this class
Examine and modify the check boxes related to method stubs and comments
Click on the Finish button
Viewing the newly created java class
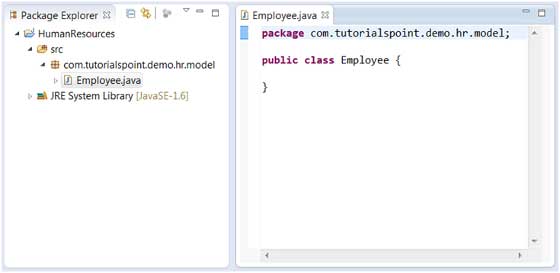
The newly created class should appear in the Package Explorer view and a java editor instance that allows you to modify the new class should appear in the editor area.
 |
Eclipse - Create Java Interface
Opening the New Java Interface wizard
The New Java Interface wizard can be used to create a new java interface. There are many ways of opening this wizard:
- Clicking on the File menu and selecting New > Interface
- Right clicking in the package explorer and selecting New > Interface
- Clicking on the class drop down button (
 ) in the tool bar and selecting Interface (
 )
)
Before bringing up the New Java Interface wizard, if possible, select the package in which the interface is to be created so that the wizard can automatically fill in the package name for you.
Using the New Java Interface wizard
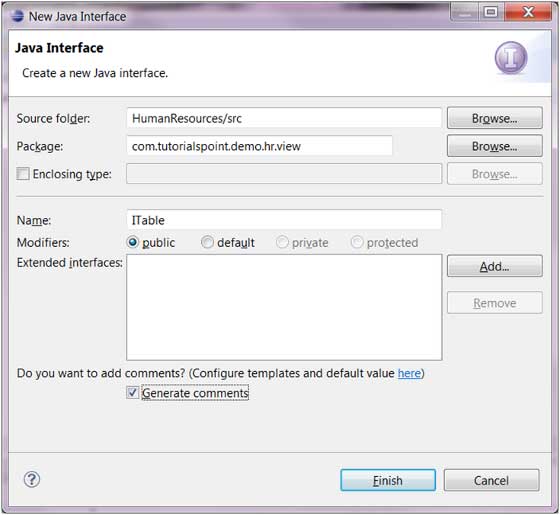
Once the java interface wizard comes up:
- Ensure the source folder and package are correct
- Enter the interface name
- Click on the Add button to select the interfaces this interface should extend
- Select the Generate comments check box if you like comments to be generated
- Click on the Finish button
Viewing the newly created java interface
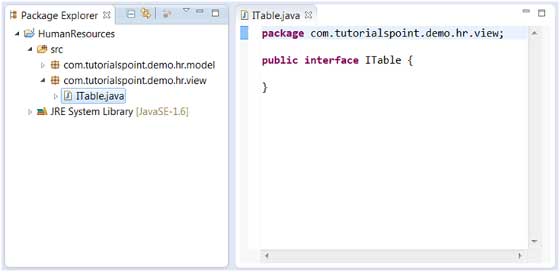
The newly created interface should appear in the Package Explorer view and a java editor instance that allows you to modify the new interface should appear in the editor area.
Eclipse - Create XML File
Opening the New XML File wizard
You can use the New XML file wizard to create an XML file. To invoke this wizard:
- Click on the File menu and select New > Other or
- Click on the new drop down box (
 ) select other or
 - Press ctrl + N
Once the Select a wizard dialog box comes up:
- In the filter text box enter xml, this should show only the wizards related to xml
- Expand XML category and select XML File
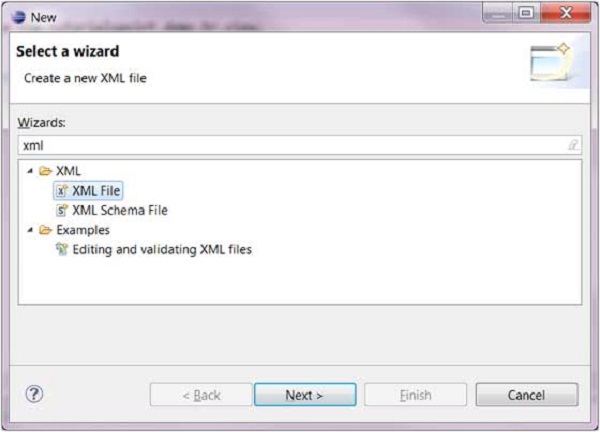
- Click on Next to bring up the New XML File wizard
NOTE:
If the XML perspective is open the New XML wizard can be invoked by:
- Clicking on the File menu and selecting New > XML File or
- Clicking on the XML File button (
 ) on the tool bar
Using the New XML File wizard
Once the New XML File wizard comes up:
- Enter or select the parent folder
- Enter the name of the xml file
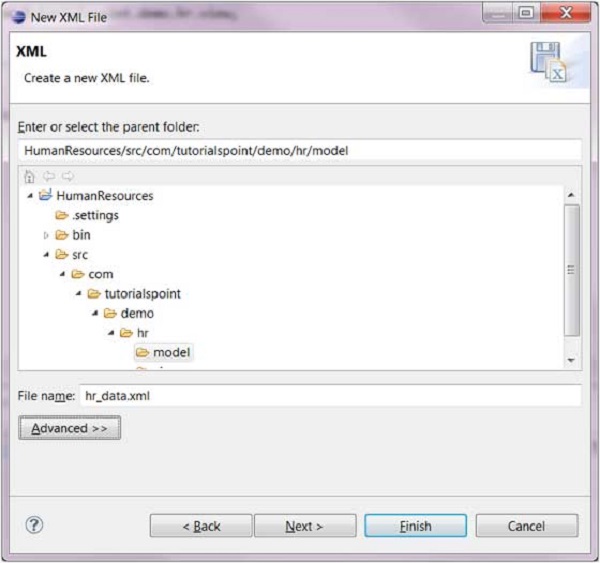
- Click on the Next button to base the xml file on DTD, XML Schema or XML template else click on Finish
Viewing the newly created XML File
The newly created XML file should appear in the Package Explorer view and an XML editor instance that allows you to modify the newly created XML file should appear in the editor area.
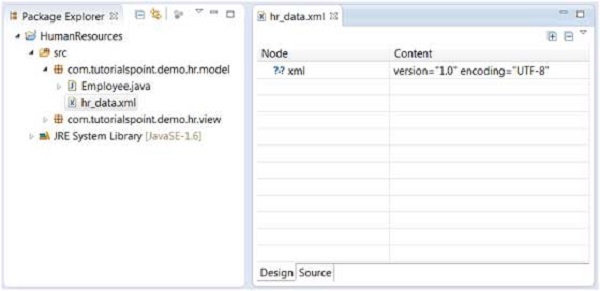
The XML editor allows you to edit an XML file using either the Design view or Source view.
Eclipse - Java Build Path
Setting the Java Build Path
The Java build path is used while compiling a Java project to discover dependent classes . It is made up of the following items:
- Code in the source folders
- Jars and classes folder associated with the project
- Classes and libraries exported by projects referenced by this project
The java build path can be seen and modified by using the Java Build Path page of the Java Project properties dialog.
To bring up the Java Project properties dialog box, right click on a Java Project in the Package Explorer view and select the Properties menu item. On the left hand side tree select Java Build Path.
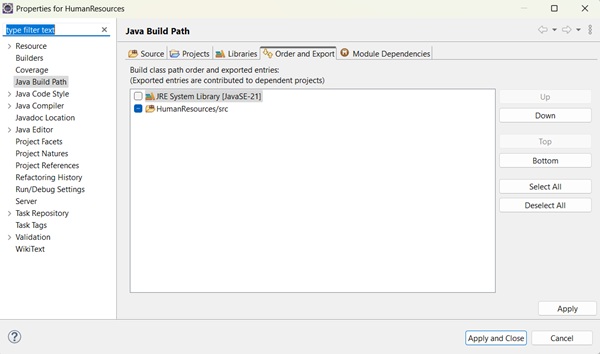
A common requirement seen while developing java applications is to add existing jars to the java build path. This can be accomplished using the Libraries tab. In the Libraries tab, just click on Add JARs if the jar is already in the Eclipse workspace or click on Add External JARs if the jar is elsewhere in the file system.
Eclipse - Run Configuration
Creating and Using a Run Configuration
The Run Configurations dialog allows you create multiple run configurations. Each run configuration can start an application.
The Run Configuration dialog can be invoked by selecting the Run Configurations menu item from the Run menu.
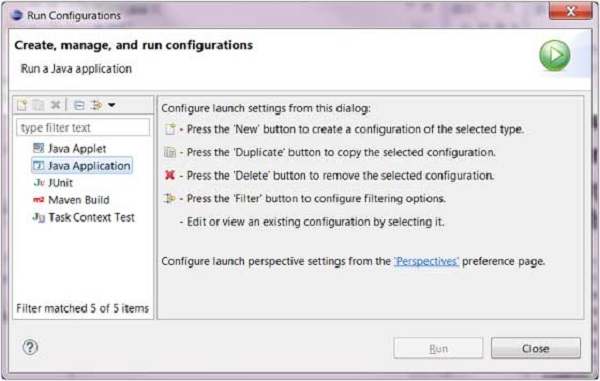
To create a run configuration for a Java application select "Java Application" from the list on the left hand side and click on the New button.
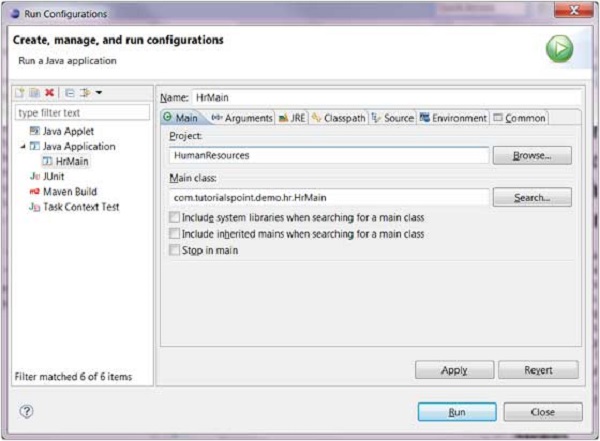
In the dialog box that comes up in the main tab specify:
- A name for the run configuration
- The name of a Project
- The name of the main class
In the arguments tab specify:
- Zero or more program arguments
- Zero or more Virtual Machine arguments
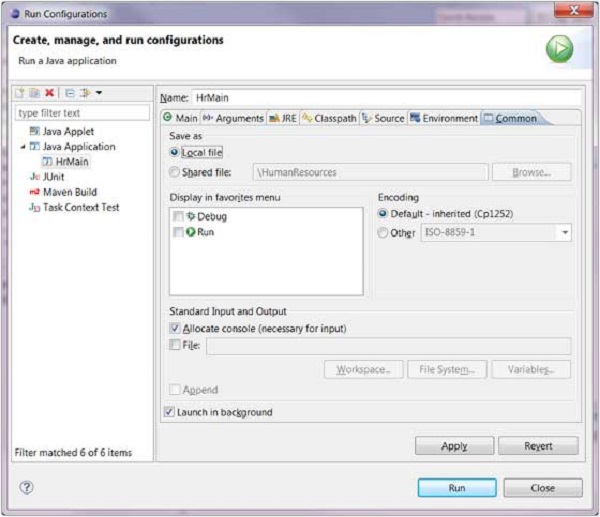
The Commons tab provides common options such as the ability to allocate a console for standard input and output.
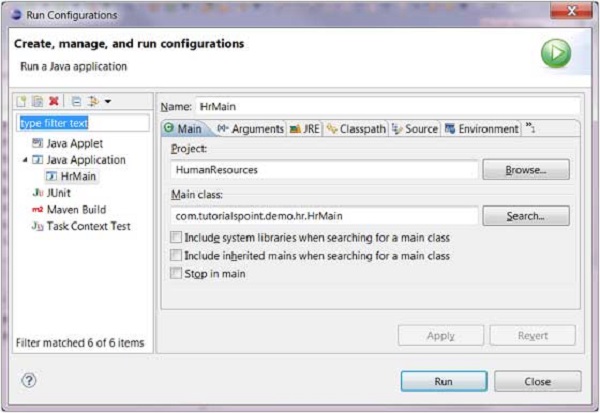
To save the run configuration click on the Apply button and to launch the application click on the Run button.
Eclipse - Running Program
Running a Java Program
The quickest way to run a Java program is to using the Package Explorer view.
In the Package Explorer view:
- Right click on the java class that contains the main method
- Select Run As > Java Application
The same action can be performed using the Package Explorer view by selecting the class that contains the main method and pressing Alt + Shift + X, J
Either actions mentioned above create a new Run Configuration and use it to start the Java application.
If a Run configuration has already been created you can use it to start the Java application by selecting Run Configurations from the Run menu, clicking on the name of the run configuration and then clicking on the Run button.
The Run menu item on the Run menu can be used to restart the java application that was previously started.
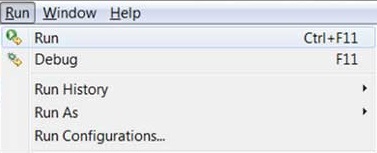
The shortcut key to launch the previously launched Java application is Ctrl + F11.
No comments:
Post a Comment